上一篇文章介绍了 Dear ImGui 的LUA绑定,让你在一分钟内感受到 Dear ImGui 的威力, 但是用 Lua 脚本的人不是那么多,这次我们使用 Python 脚本来完成类似的事情。
开工
参考pyimgui。
注意: 如果你直接用 pyimgui 的示例代码,你将什么也看不到,没有窗口,也没有出错提示。
打开终端, 安装依赖
1
|
pip install imgui[full] PyOpenGL PyOpenGL_accelerate
|
建立一个 python 脚本文件, test_imgui.py, 内容如下:
 1
 2
 3
 4
 5
 6
 7
 8
 9
10
11
12
13
14
15
16
17
18
19
20
21
22
23
24
25
26
27
28
29
30
31
32
33
34
35
36
37
38
39
40
41
42
43
|
import imgui
from imgui.integrations.sdl2 import SDL2Renderer
import sdl2
import sdl2.ext
import OpenGL.GL as gl
from PIL import Image

sdl2.ext.init()

width, height = 800, 600
window = sdl2.ext.Window("ImGui SDL2 Example", size=(width, height), flags=sdl2.SDL_WINDOW_OPENGL)
gl_context = sdl2.SDL_GL_CreateContext(window.window)
gl.glClearColor(1, 1, 1, 1)

# 初始化 PyImGui
ctx = imgui.create_context()
imgui.get_io().display_size = width, height
imgui.get_io().fonts.get_tex_data_as_rgba32()

# 创建 SDL2Renderer 时,传递 SDL_Window 实例,而不是窗口对象
renderer = SDL2Renderer(window.window)

running = True
while running:
    for event in sdl2.ext.get_events():
        if event.type == sdl2.SDL_QUIT:
            running = False

    imgui.new_frame()               # 开始 ImGui 帧
    imgui.text("Hello, ImGui!")     # 在这里添加你的 ImGui 绘制代码
    imgui.render()                  # 结束 ImGui 帧
    drawdata = imgui.get_draw_data()

    # 清空屏幕
    gl.glViewport(0, 0, width, height)
    gl.glClear(gl.GL_COLOR_BUFFER_BIT)
    renderer.render(drawdata)               # 渲染 ImGui 到屏幕
    sdl2.SDL_GL_SwapWindow(window.window)   # 刷新窗口

renderer.shutdown()
imgui.destroy_context(ctx)
sdl2.SDL_GL_DeleteContext(gl_context)
sdl2.ext.quit()
|
运行脚本
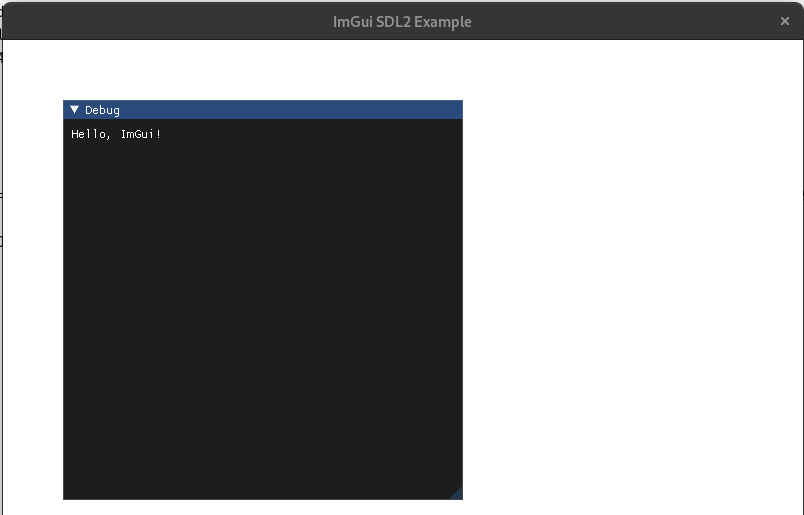
你将会看到如下图的图形窗口。


